The Timesheet allows employees to enter the time they have spent on activities. The "Timesheet" tab have the same features as the "Completed activities" tab ; only the display is different.
 The timesheet allows you to enter your time spent via an ergonomic interface. This is an alternative to entering via the "Completed Activities" tab when one employee is assigned to a large number of contracts at a time.
To enable the timesheet, go to the Settings > Activities tab > Enable the TimeSheet.

You can see below the timesheet. A summary of the week is presented in the gray top banner of each week: number of working days, status of the timesheet, etc.
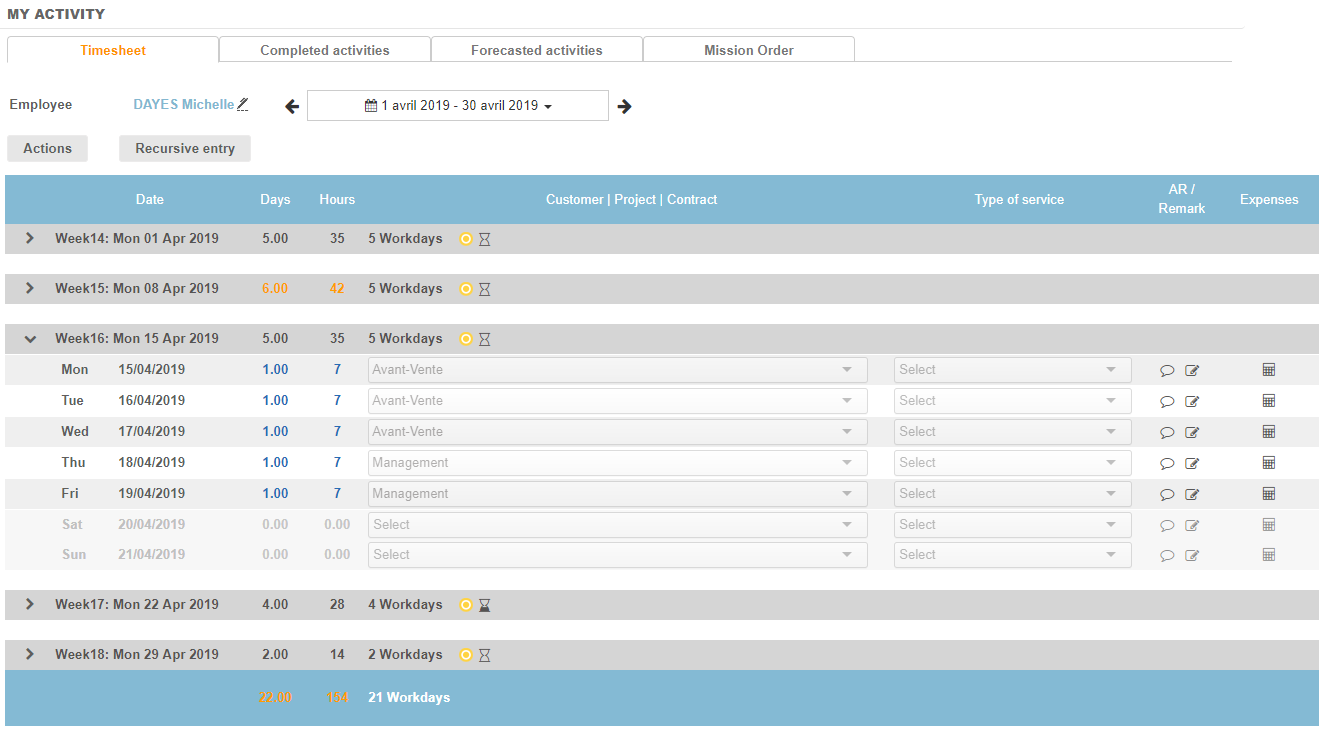
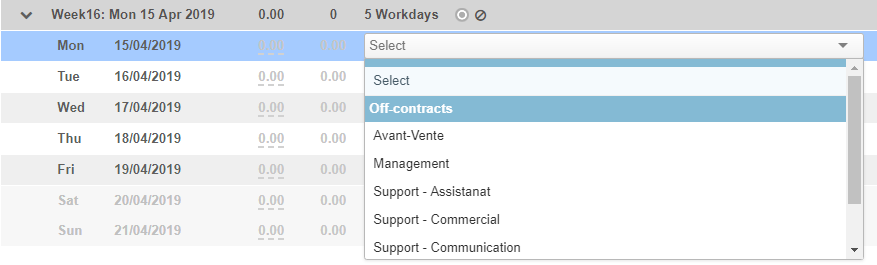
You can entry the time spent from this timesheet. You will be able to select the activity for each line by choosing from the drop-down list: off-contract activity or contract + type of service. This depends on the choice of settings for the selection of the type of service.
Once you have chosen the activity, you can fill in the time spent in the left column in days or hours.
It is of course possible to enter several lines per day, for that just click on the plus  on the left of the day of the week. To delete a line, click on the cross
  .
.
By clicking on the icon  , you can see the Budget Days defined on the selected activity. This feature makes it possible to compare the cumulative total with a quantity of days sold to analyze profitability.
To note: A time sheet must be completed to be submitted to validation.
Entering an expense note from the timesheet
The timesheet also allows the entry of expenses via the button  . Once an activity has been completed, it is possible to add an associated expense note.
Available setting points
Validation of a timesheet can be secured by configuring a workflow.
If a workflow is existing, once you have entered and saved your time entry, you can submit it by clicking on the button "Submit for approval":
